



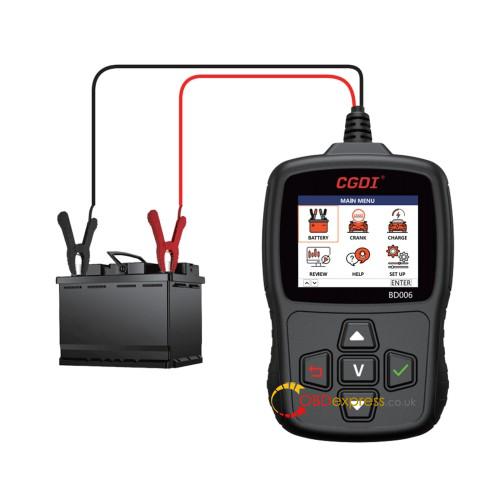
The CGDI BD006 Car Battery Tester uses conductance testing technology to quickly measure a starting battery’s cold-cranking capability and state of health (SOH). This manual covers four main functions: Battery Test, Cranking Test, Charging Test, and Voltage Acquisition.
Battery Test
The CGDI BD006 Battery Test function is for 12V lead-acid batteries.
- Before Testing
Before testing in the vehicle:
- Turn off all accessory loads.
- Remove the key from the ignition.
- Close the doors.
- If the vehicle was running, turn on the headlights to discharge the battery’s surface charge.
- Let the battery rest for at least 1 minute before testing.
- Test Procedure
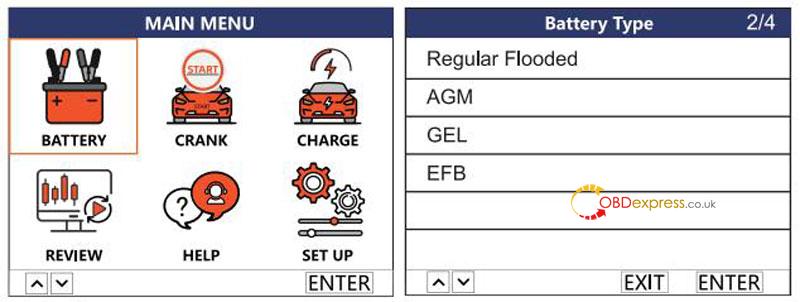
- Select BATTERY and press [Enter].
- Select the battery type and press [Enter]. Check the battery label for the type.
- Select the battery standard and press [Enter]. Check the battery label for the standard.
- Enter the CCA with the ▲/▼ keys, then press [Enter] to start the test.
- Short-press ▲/▼ to change the value by 5.
- Press and hold ▲/▼ to change the value continuously.
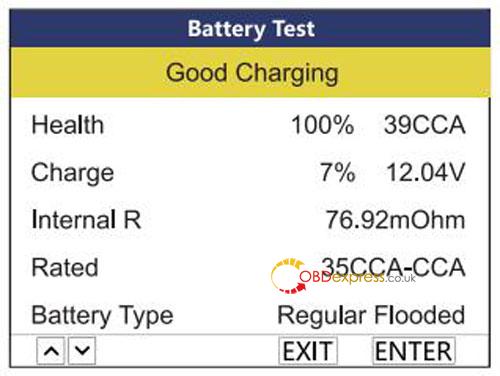
- The test result appears on the display.
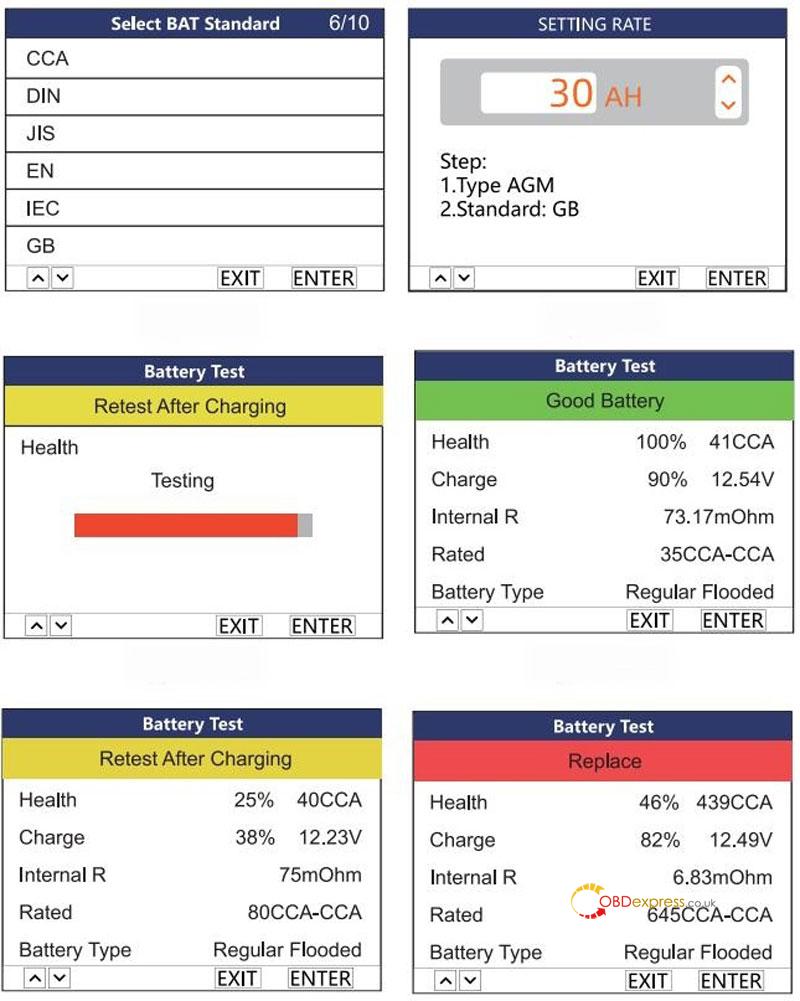
- Battery Test Results
| Result | Meaning |
| Good Battery | Battery condition is good. |
| Good Charging | Battery condition is good. Charge the battery. |
| Replace | Replace the battery. |
| Retest After Charging | Charge the battery and test again. |
- Battery Test Terminology
| Term | Description |
| Health (SOH) | Battery condition compared with a new battery, considering cell aging. |
| Charge (SOC) | Remaining battery charge compared with its maximum available charge. |
| Internal R (Internal Resistance) | Resistance to current flow in the cells and battery. It is affected by electronic and ionic resistance. |
| Rated | The CCA entered in the previous step, based on the CCA shown on the battery label. The difference between rated and actual CCA affects the test result. |
Cranking Test
The Cranking Test supports 12V and 24V lead-acid batteries.
- Before Testing
Turn off the engine and all accessory loads before testing.
- Test Procedure
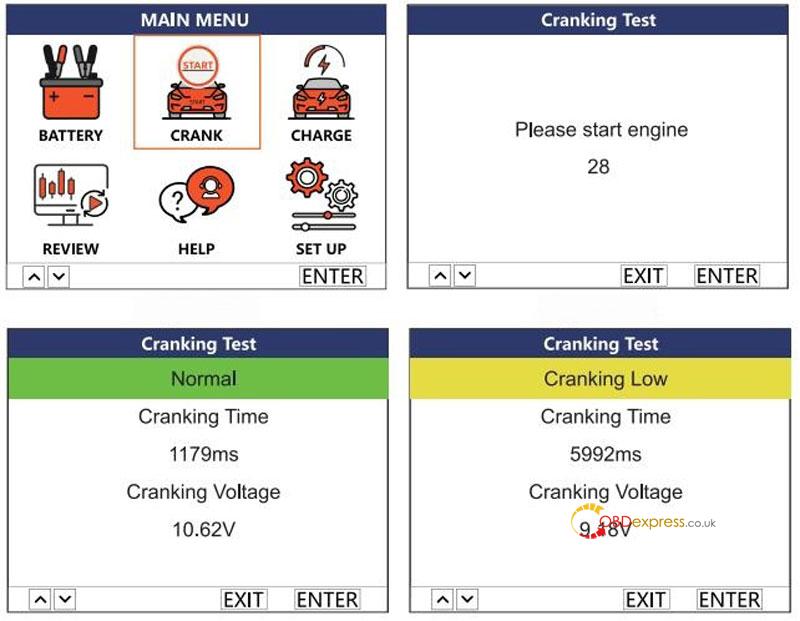
- Select CRANK and press [Enter].
- Follow the on-screen prompt and crank the engine.
- The result appears on the screen, including cranking time and cranking voltage.
- Cranking Test Results
Cranking Time: Time required to start the engine.
Cranking Voltage: Battery voltage while the engine is starting.
The result is typically:
Cranking Low • Normal • Good
Charging Test
The Charging Test supports 12V and 24V lead-acid batteries.
- Before Testing
Start the engine before performing the charging test.
- Test Procedure
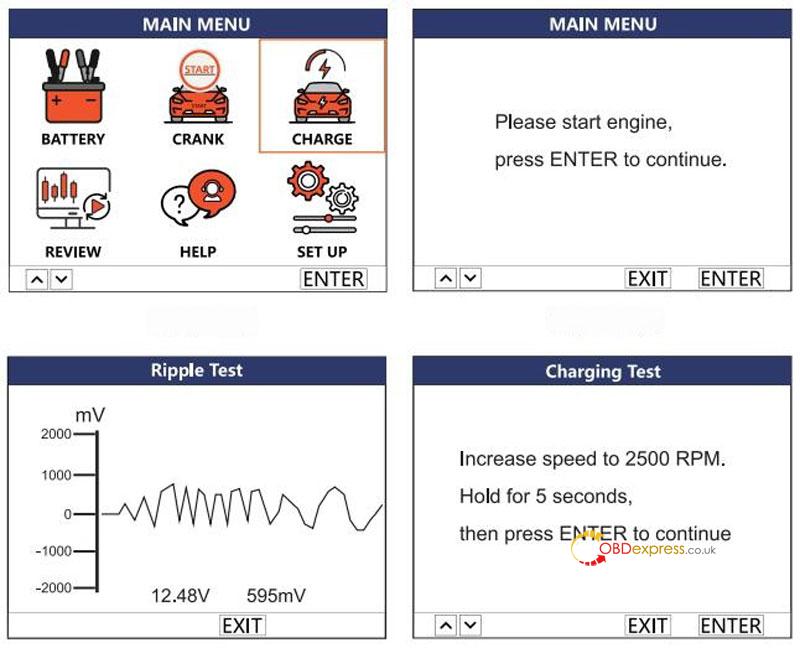
- Select CHARGE from the home screen and press [Enter].
- Confirm that the engine is running and press [Enter].
- The tester performs a ripple test. The result appears as a graph. After 10 seconds, it moves to the next step.
- Turn off loads such as the headlights and blower motor. Press [Enter].
- Increase the engine speed to 2500 RPM. Press [Enter].
- Release the throttle. Press [Enter].
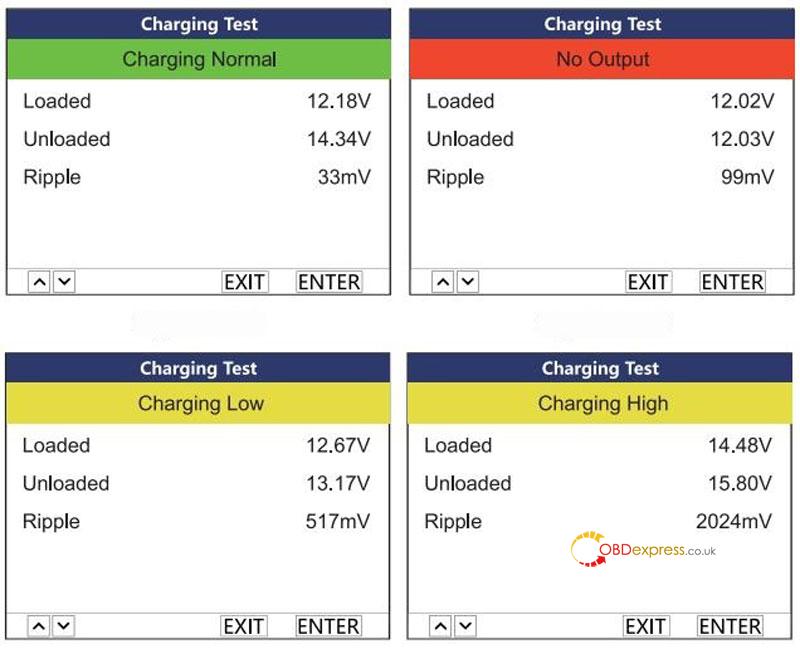
- The charging test result appears on the display.
- Charging Test Results
The result is typically:
No Output
Charging Low
Charging Normal
Charging High
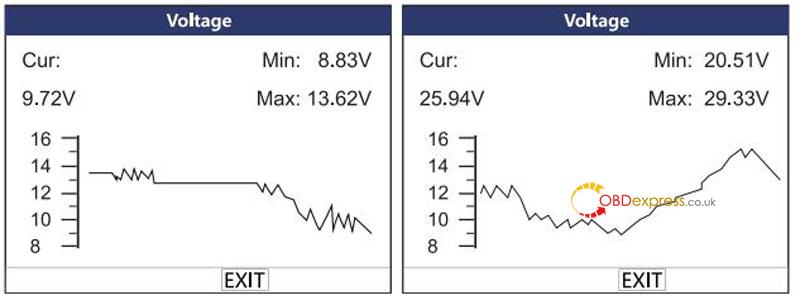
Voltage Acquisition
The Voltage Acquisition function displays the vehicle’s voltage information.
- Test Procedure
From the main menu, press V to start the function.
The display shows:
Current voltage
Maximum and minimum voltage
Voltage trend curve
Select Exit to return to the main menu.